The needle is the cheapest part of machine embroidery and one of the most common causes of trouble. A needle that's too big leaves holes, one that's too small shreds the thread, a sharp point can cut a knit, and a worn one breaks thread no matter what else you change.
The good news is that a few needles cover almost everything. This guide explains how sizes work, the main point types, which needle suits each fabric and thread, and when to change it. The stabilizer finder also suggests a needle for each fabric.
How embroidery needle sizes work
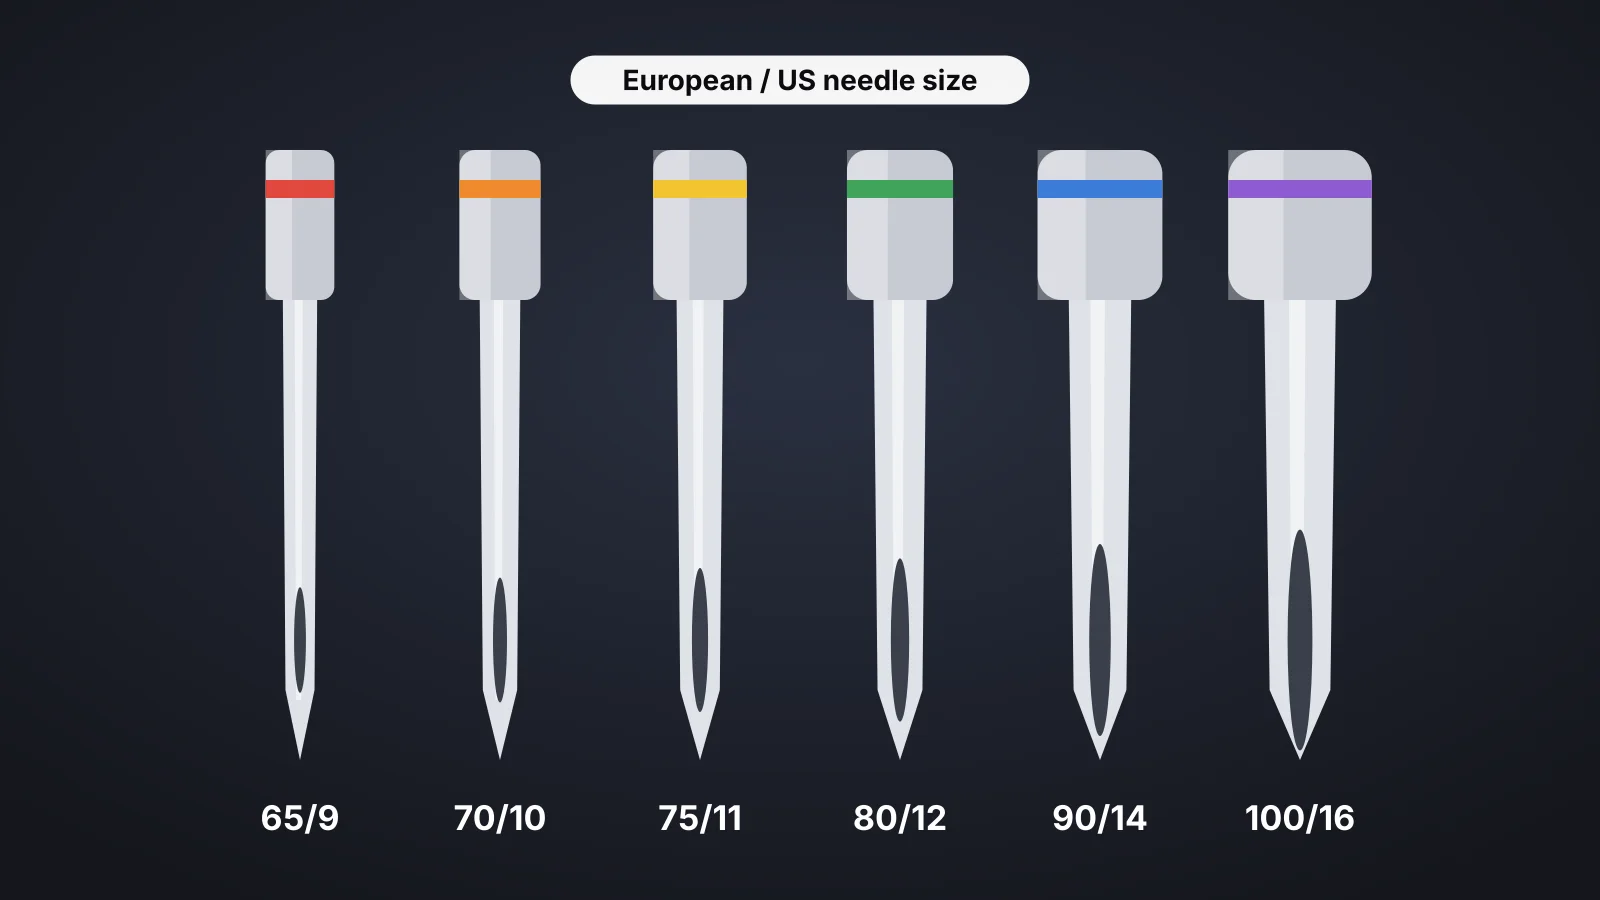
Needles are labeled with two numbers, such as 75/11. The first is the metric size, the shaft diameter in hundredths of a millimeter, so a 75 is 0.75 mm thick. The second is the US size for the same needle. Bigger numbers mean thicker needles in both systems.
Embroidery needles differ from universal sewing needles in a few ways that matter at embroidery speeds: a larger eye and a shaft shape that protect rayon and polyester embroidery thread from friction. A universal needle will sew a design, but an embroidery needle usually means fewer breaks and less shredding.
Embroidery needle size chart
| Needle | Thread | Typical fabrics | Good to know |
|---|---|---|---|
| 65/9 | 60 wt | Sheer fabrics, silk, organza, fine shirting | For tiny lettering and fine detail with fine thread |
| 70/10 | 60 wt or a fine 40 wt | Lightweight knits, performance wear, fine wovens | A common choice on thin athletic fabric |
| 75/11 | 40 wt | T-shirts, polos, cotton, twill, caps, towels | The standard embroidery needle; start here |
| 80/12 | 40 wt, some 30 wt | Sweatshirts, heavier twill, caps, canvas, denim | A step up for thicker fabric and some specialty threads |
| 90/14 | 30 wt or 40 wt | Heavy denim, canvas, thick bags, several layers | For heavy work; leaves larger holes on light fabric |
| 100/16 | Heavy specialty thread | Very thick or layered materials | Rarely needed for home embroidery |
If you only keep two sizes, make them 75/11 ballpoint and 75/11 sharp. Add 80/12 or 90/14 sharp for denim and canvas, and 65/9 or 70/10 if you sew small lettering in 60-weight thread.
Try it with your own design
Sign up free, upload an image and get a stitch preview in under a minute.
Drop your image here
PNG, JPG, WebP or SVG · stays on your device
Ballpoint, sharp, titanium and other needle types
| Type | How it works | Use it on |
|---|---|---|
| Ballpoint | A slightly rounded tip that slides between knit loops instead of piercing them | T-shirts, polos, sweatshirts, hoodies, performance wear and beanies |
| Sharp | A fine point that pierces the weave cleanly | Woven shirts, twill, denim, canvas, caps, towels and leather |
| Titanium-coated | A hard coating, often on a sharp point, that wears more slowly | Long runs, adhesive stabilizers and busy production machines |
| Metallic or large-eye | An elongated eye that reduces friction on delicate thread | Metallic and other specialty threads |
| Leather | A cutting point that slices rather than pierces | Thick leather, with care; many embroiderers prefer a sharp |
The wrong point causes problems that look like file problems. A sharp needle on a T-shirt can cut the knit loops and leave small holes or runs around the design; a ballpoint on a tight woven can deflect and stitch less crisply.
Titanium needles usually last longer than chrome ones and resist the gummy buildup that adhesive stabilizers and spray leave on the shaft. They cost more, so many home embroiderers keep them for long runs and sticky backings. On leather, many embroiderers use a 75/11 sharp rather than a leather needle, because a cutting point makes slits that can join up under dense stitching. Either way, keep leather designs light and test on a scrap.
Which needle for which fabric
| Fabric | Needle | Notes |
|---|---|---|
| T-shirt | 75/11 ballpoint | Pair with cut-away or no-show mesh |
| Polo (piqué) | 75/11 ballpoint | Add a topping for small lettering |
| Hoodie or sweatshirt | 75/11 or 80/12 ballpoint | The thicker the fleece, the more an 80/12 helps |
| Performance or stretch | 70/10 or 75/11 ballpoint | Keep designs light on thin fabric |
| Woven shirt (cotton, oxford) | 75/11 sharp | Tear-away suits most designs |
| Denim or canvas | 80/12 or 90/14 sharp, or a jeans needle on heavy denim | Keep the design clear of thick seams |
| Tote bag | 80/12 or 90/14 sharp | Hoop only the front panel |
| Structured cap | 75/11 or 80/12 sharp | Buckram fronts are stiff; a sharp point pierces them cleanly |
| Towel (terry) | 75/11 or 80/12 sharp | Always use a water-soluble topping |
| Leather or vinyl | 75/11 or 80/12 sharp, or a leather needle | Every hole is permanent; test first |
| Sheer (silk, organza) | 65/9 or 70/10 sharp | Light, open designs only |
These match the recommendations in the stabilizer finder, which pairs each fabric with a backing, a topping and a hooping method too. For denim specifically, the denim guide covers seams, hooping and jacket backs.
Matching the needle to the thread
The thread has to pass through the eye smoothly, and the needle has to make a hole big enough for the thread to follow without fraying. Too small a needle for the thread is a classic cause of shredding; too large leaves visible holes around small details.
- 40-weight thread (the standard): 75/11 on most fabrics, 80/12 on heavier ones.
- 60-weight thread for small lettering: 65/9 or 70/10, which keeps fine detail crisp.
- 30-weight thread for bold coverage: often 90/14.
- Metallic thread: a metallic or large-eye needle, often 80/12 or 90/14, at a slower speed.
Changing the thread weight can mean changing the file too: a design digitized for 40-weight covers less in 60-weight. The thread guide and the density guide explain why.
When to change the needle
Needles wear faster in embroidery than in sewing, because a single design can be tens of thousands of stitches. Many embroiderers fit a new needle every 8–10 hours of stitching. Change it sooner when:
- It hits the hoop, a pin, a clip or a seam hard enough to make a sharp knock.
- Thread starts shredding, fraying or breaking, especially in the same spot.
- You see skipped stitches, or hear a louder thudding or popping as the needle goes in.
- It's bent, or you feel a burr when you run a fingernail gently down the tip.
- You move from a knit to a woven, or from light fabric to denim.
Changing the needle is the first fix for thread breaks, before you touch the tension. It takes a minute, and the problems and fixes guide lists what to try next if it doesn't help.
Needle systems and fitting a needle
Home and commercial machines take different needle systems, so buy the type your manual lists. Most home embroidery machines use flat-shank needles in the 130/705 H system, with embroidery versions often marked H-E. Most commercial multi-needle machines use round-shank needles in the DBxK5 system.
- Flat-shank needles on most home machines go in with the flat side facing the back, pushed all the way up before you tighten the clamp.
- Round-shank needles on commercial machines have no flat side, so the orientation of the groove and eye matters. Follow the manual exactly.
- Turn the machine off before changing a needle, and check the new one sits straight.
A needle that isn't fully seated is a common cause of skipped stitches and broken needles straight after a change. If problems start right after fitting a new needle, take it out and seat it again.