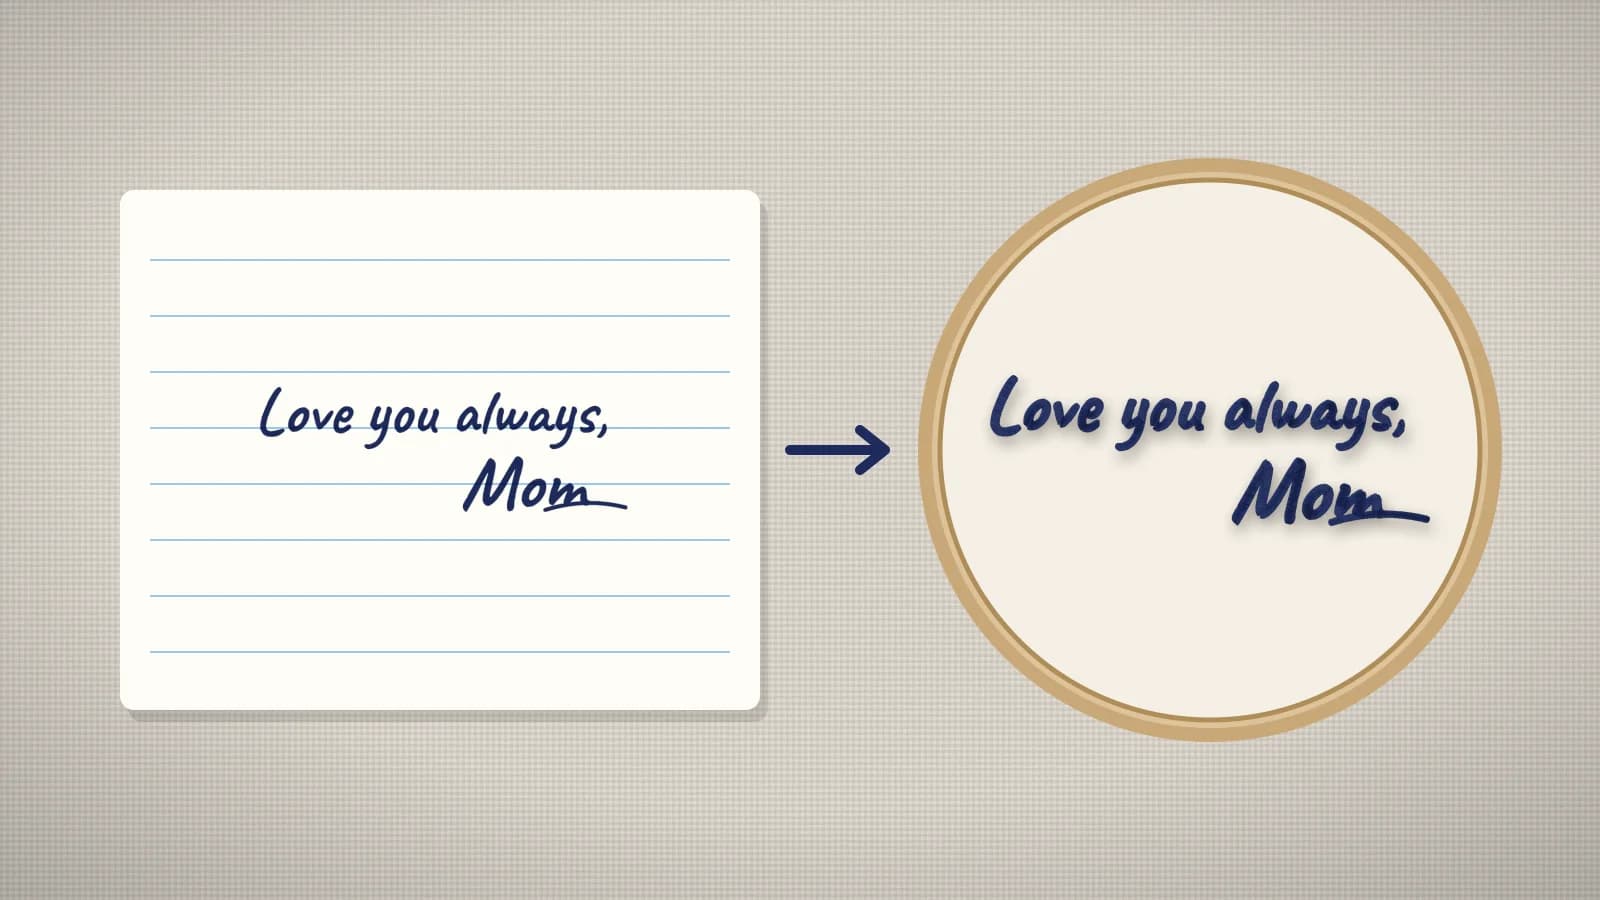
A loved one's handwriting is one of the most personal things you can stitch: a grandmother's recipe card on an apron, a parent's 'love you' note on a pillow, a signature on a quilt or a memorial blanket. Done well, the embroidery keeps every curve and quirk of the original, which a font never can.
This guide covers choosing the writing, scanning it, cleaning it up, size and line thickness, the stitch types, keepsakes and the file. The handwriting to embroidery page sums it up, and turning a drawing into embroidery covers kids' drawings, which follow the same rules.
Choosing the writing
- Dark ink on plain paper gives the cleanest result. Pencil, faded ink and writing on patterned or lined paper need more cleaning up.
- A short passage works best: a signature, a phrase such as 'Love, Mom', a few lines of a letter or one recipe. A whole page shrinks to letters too small to stitch.
- Pick the words, then crop. You can stitch one line from a long letter, or pair a phrase from one card with a signature from another.
- Thicker pens stitch better. Felt-tip and marker strokes can become satin; ballpoint and fine-liner strokes usually become running or bean stitch.
- Work from a copy of anything fragile or irreplaceable, and handle the original as little as possible.
If the writer can, ask them to write the words again with a felt-tip or marker on plain white paper. You get bolder strokes and a clean background, and the gift has a story.
Scanning or photographing it
- Scan at 300 dpi if you can, in color or grayscale. For a small signature you'll enlarge a lot, 600 dpi keeps the edges smoother.
- Or photograph it in daylight, flat on a table, with the phone held straight above it so the writing isn't skewed. Keep shadows from your hand and the phone off the page.
- Flatten folded letters under a heavy book first, so the creases don't show up as lines.
- Save it as a PNG or a high-quality JPG. PNG, JPG, WebP and SVG all upload to the digitizer.
Photos of old cards often pick up a yellow cast and uneven light. That's fine: the next step turns the ink dark and the paper plain white.
Try it with your own design
Sign up free, upload an image and get a stitch preview in under a minute.
Drop your image here
PNG, JPG, WebP or SVG · stays on your device
Cleaning up the strokes
- Crop tight round the words you want.
- Raise the contrast in a photo editor until the ink is solid and dark and the paper is plain white. Faint strokes that vanish here will probably drop out of the stitches too.
- Remove what isn't writing: ruled lines, smudges, stains, fold lines and ink showing through from the back.
- Mend gaps carefully. Where a pen skipped, join the stroke with a matching line. Leave the writer's quirks alone; they're the point.
- Thicken strokes that are too thin for the size you'll stitch, by tracing over them with a slightly bolder brush, if you want satin rather than a fine line.
- Keep it to one ink color on a white background. The image color reducer can flatten a photo to a few flat colors, and the background remover cuts the writing out of plain paper.
Then run the image through the embroidery image checker, which looks at the colors, fine detail and resolution and suggests fixes.
Size and line thickness
Two things decide how handwriting stitches: the height of the letters and the width of the strokes, both at the final stitched size, not on paper.
| At the final size | What happens |
|---|---|
| Letters at least about 6 mm tall | Loops and the gaps inside letters stay open |
| Strokes under about 0.75 mm wide | They become a single running or bean line, like a pen |
| Strokes about 1 mm wide or more | They can become satin: smooth, shiny and slightly raised, like a marker |
| Gaps under about 1 mm | They close up as the thread spreads; open them up or stitch larger |
Strokes grow and shrink with the design. A ballpoint line about 0.5 mm wide on paper, enlarged to twice the size, becomes about 1 mm wide: just enough for a narrow satin. Shrink the same writing and it becomes a running line. Typical sizes:
| Project | Typical width |
|---|---|
| Signature on a shirt or cap | About 3–4 in (75–100 mm) |
| Quilt label | About 4–5 in (100–125 mm) |
| Apron or tea towel | About 4–7 in (100–175 mm) |
| Pillow, recipe or note | About 6–8 in (150–200 mm) |
| Blanket | About 6–10 in (150–250 mm) |
Check the width against your hoop; the hoop size calculator shows which hoops fit.
Running, bean or satin
| Stitch | Looks like | Best for | Watch for |
|---|---|---|---|
| Running stitch | A fine single line, like a ballpoint pen | Signatures on smooth cotton, quilt labels and light fabrics | Disappears into fleece, towels and textured knits |
| Bean stitch | A bolder line, with each stitch sewn three times | Handwriting on quilts, aprons and kids' items | Lots of needle holes in one place on very fine fabric |
| Satin stitch | A smooth, shiny, raised stroke, like a marker | Larger writing and signatures on pillows and blankets | Needs strokes at least about 1 mm wide at the final size |
In the digitizer, stroke width at the final size decides the stitch: very thin strokes become running or bean lines, and wider ones become satin. To get satin from fine writing, stitch it larger or thicken the strokes before you upload; for a delicate pen line from bold writing, stitch it smaller, keeping the letters at least about 6 mm tall.
Blankets, pillows, aprons and other keepsakes
| Item | Backing | Stitch and preset | Tips |
|---|---|---|---|
| Fleece or minky blanket | Cut-away | Bean or satin; Fleece, towel, sweatshirt preset | Add a water-soluble topping so the strokes don't sink into the pile |
| Cotton or linen pillow cover | Tear-away, or cut-away under heavier writing | Any; Woven preset | Stitch the cover before the pillow goes in |
| Apron or tea towel | Tear-away | Bean or satin; Woven preset | A recipe card suits an apron bib or a towel's lower edge |
| Quilt label or block | Tear-away or a light cut-away | Running or bean; Woven preset | Add the date and the quilter's name |
| T-shirt | Cut-away or no-show mesh | Satin or bean; Knit preset | Keep it light so the shirt stays soft |
Each has its own guide: blankets, pillowcases, aprons and quilt labels.
Practice on a free design
114 ready-to-sew designs in every machine format, free with an account.
Making the file and adding a name or date
Upload the cleaned-up image to the digitizer, set the width and pick the fabric preset. Writing in one dark ink on white paper usually comes through as a single thread color. Check the realistic stitch preview at full size, looking for loops that have closed up and strokes that turned into running lines where you wanted satin. Digitizing and previewing are free with an account; downloading the file needs a paid plan.
- Add a name or a date in a font with text to embroidery, and put the two together in the design combiner; saving the files needs a paid plan. Or add the text to the image before you upload.
- Choose a thread that suits the ink: navy, black or a deep brown look like real ink, or pick a color that matches the room for a pillow.
- Test on a scrap of the same fabric with the same backing before you stitch a one-of-a-kind keepsake.
- Watch it stitch first: the sew-out simulator plays any embroidery file color by color, so you can check it before it touches the fabric.