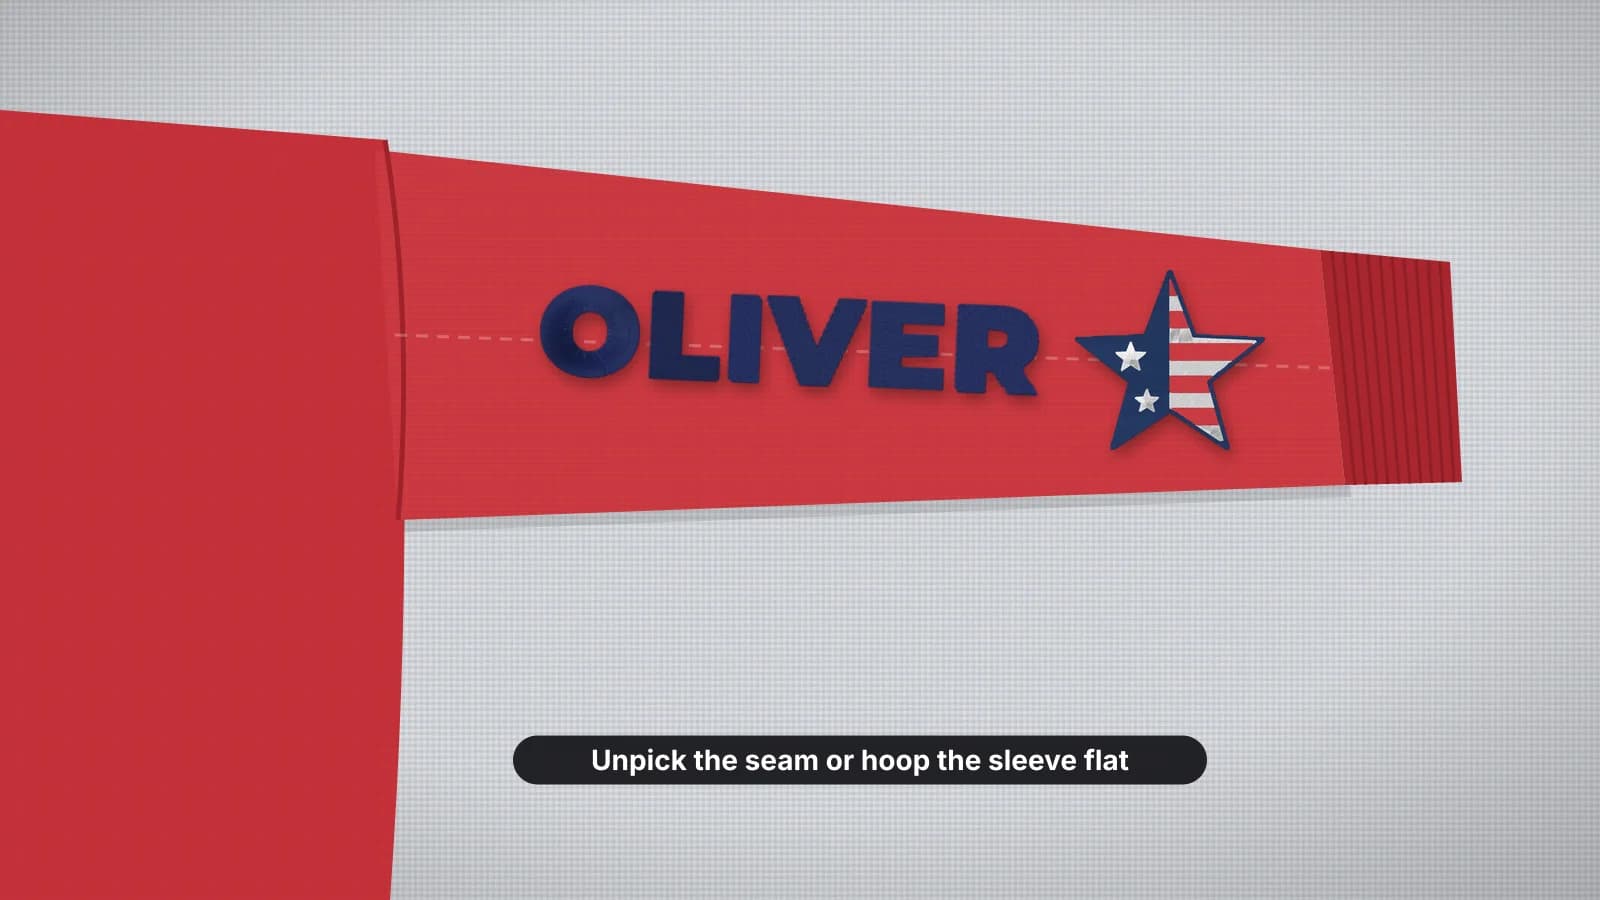
Sleeves are the second spot on a lot of garments: a flag on a work polo, a small logo on a team hoodie, a name or a slogan running down the arm. The designs are small, but a sleeve is a narrow tube, and the hard part is getting just one layer of it under the needle.
This guide covers placement and sizes, three ways to hoop a sleeve, long text down the arm, orientation, stabilizer and the file. The sleeve size page has the standard sizes at a glance.
Where sleeve designs go
| Placement | Where exactly | Good for |
|---|---|---|
| Upper sleeve | Outside of the arm, about 2–4 in (50–100 mm) below the shoulder seam, centered or a little toward the front | Flags, small logos, event dates and short words |
| Down the arm | Along the outside of a long sleeve, starting a few inches below the shoulder | Names, slogans and other long text |
| Forearm | Outside of a long sleeve, a few inches above the cuff | A small logo or a short word |
| Cuff | On the cuff itself, or just above the cuff seam | Initials, a small icon, or a monogram on a dress shirt |
| Raglan and drop-shoulder sleeves | Measured from where the shoulder sits on the body, since the seam is elsewhere | The same designs; check the position on a person |
Which arm? The wearer's left sleeve is a common choice for a flag or a second logo, but either works. Pick one and keep it the same across an order.
Put the garment on someone, or on a hanger, and mark the spot with a pin or a water-soluble pen. A design centered on the sleeve as it lies flat can end up too far toward the back once it's worn.
Sleeve embroidery sizes
| Placement | Typical size | Lettering |
|---|---|---|
| Adult upper sleeve | About 2.5–3.5 in (65–90 mm) wide, 1–3 in (25–75 mm) tall | Short words, capitals about 8–15 mm tall |
| Kids' upper sleeve | About 1.5–2.5 in (40–65 mm) wide | One short word or an initial |
| Long text down the arm | Up to about 10–11.5 in (250–294 mm) long, depending on the hoop | Letters about 12–40 mm (0.5–1.5 in) tall |
| Forearm | About 2–3 in (50–75 mm) wide | Short words, about 8–12 mm tall |
| Cuff | About 1–1.5 in (25–40 mm) wide | Initials about 6–10 mm tall |
Width is limited by the sleeve: on many adult garments the upper sleeve lies only about 6–9 in (15–23 cm) across when flat, and the design has to stay on the outside of the arm. Length is limited by the hoop: a 6×10 in hoop takes about 10 in (254 mm) of stitching along its length, and an 8×12 in hoop about 11.5 in (294 mm).
Try it with your own design
Sign up free, upload an image and get a stitch preview in under a minute.
Drop your image here
PNG, JPG, WebP or SVG · stays on your device
Hooping a sleeve: three ways in
Only the outer layer of the sleeve should be under the needle. Depending on the machine and the sleeve, there are three ways to manage it:
- Open the sleeve seam. Unpick the underarm seam far enough for the hoop, often about 8–10 in (20–25 cm), lay the sleeve flat, hoop it, stitch, then sew the seam closed again. It's the most reliable method on a flatbed home machine. T-shirt seams are usually overlocked, so close them with an overlocker or a zigzag stitch.
- Use a tubular arm. Multi-needle machines have a narrow tubular arm, so the sleeve slides over it with only the outer layer in a small hoop. Some home machines offer sleeve or free-arm hoops too; check what yours supports.
- Float the outer layer. Hoop sticky stabilizer, slide the hoop into the sleeve so the outer layer lies on it, and pull the rest of the sleeve out from under the stitching area, clipping it out of the way. It only works when the sleeve is wide enough to clear the hoop, so it suits adult hoodies and sweatshirts with a small hoop more than fitted or kids' sleeves.
Whichever you choose, run a hand under the hoop before you press start, to check that only the outer layer and the stabilizer are there. The floating entry and how to hoop fabric cover the basics.
Making the garment yourself? Embroider the sleeve piece flat before you sew it up. It's the easiest way of all, and the back of the design ends up inside the sleeve.
Long text down the sleeve
- Hoop along the sleeve. Long text needs a long hoop, such as a 6×10 or 8×12 in, turned so its length runs down the arm. Open the seam if the sleeve is too narrow for the hoop.
- Mind the taper. Sleeves narrow toward the cuff, so text that fits near the shoulder can run off the outside of the arm lower down. Measure at both ends.
- Use a condensed or block font. Narrow letters fit more text into a strip and stay readable at about 12–25 mm tall. The best fonts guide compares them.
- Keep it to one line. Two lines side by side wrap round the arm and won't read when it hangs down.
- Split very long text into two hoopings that line up end to end. How to split a large design explains lining up the parts.
Long sleeve text usually reads from the shoulder down toward the cuff, but there's no single rule. Decide which way it reads and which side the tops of the letters face, then show it on a proof before you stitch a batch.
Getting it the right way up
- Rotate the design for the hoop. Sleeve designs often sew sideways or upside down relative to how they're worn. Turn the design on the machine, or rotate it 90° in the digitizer before you download.
- Mark the shoulder end on the stabilizer or a piece of tape, so you know which way is up once the sleeve is in the hoop.
- Right-sleeve flags are sometimes mirrored, so the flag faces forward as it would on a moving flagpole, as on some uniforms. Decide before you digitize, and never mirror text.
- Check the preview at the real size. A design that looks fine on screen can be too wide for a kids' sleeve.
Print the design at true size with the placement template and pin it to the sleeve to check the size and the angle before you hoop.
Stabilizer for knit, woven and fleece sleeves
| Sleeve | Backing | Topping | Needle |
|---|---|---|---|
| T-shirt and polo knit | Cut-away or no-show mesh | Not usually needed | 75/11 ballpoint |
| Hoodie and sweatshirt fleece | Medium cut-away | Water-soluble topping | 75/11 ballpoint |
| Woven shirt or work shirt | Tear-away, or cut-away under dense designs | Not needed | 75/11 sharp |
| Jacket shell (nylon or twill) | Tear-away or cut-away, floated if the fabric marks | Not needed | 75/11 sharp |
| Performance and stretch fabric | No-show mesh or a light cut-away | Not usually needed | 70/10 or 75/11 ballpoint |
The T-shirt and hoodie stabilizer pages have the full setups.
Practice on a free design
114 ready-to-sew designs in every machine format, free with an account.
Making a sleeve file
- A logo or flag: upload it to the digitizer, set the width to fit the sleeve and pick the fabric preset, such as Knit for T-shirts and polos or Fleece, towel, sweatshirt for hoodies. Digitizing and previewing are free with an account; downloading the file needs a paid plan.
- A name or slogan: text to embroidery makes a lettering file from a choice of embroidery fonts; saving it needs a paid plan.
- A whole team's names: batch name embroidery makes every name in the same font and height, with width checks; saving the files needs a paid plan.
- A free design: the patriotic star and American flag suit a sleeve and download free with an account. Check the size against the sleeve first.