 Free toolEmbroidery file checkerScore any stitch file before you sew: hoop fit, long and tiny stitches, density heatmap, trims and colors.Open the tool
This guide is for anyone making their own stitch files, by hand or with an auto-digitizer, and for anyone wondering why a design that looked fine on screen sewed badly. Each mistake comes with what you'll see on the fabric and the fix, with the numbers digitizers work to.
If the trouble is in the hooping, threading or machine, start with common embroidery problems and fixes instead. This guide is about the file: the choices that decide how a design sews before it reaches the machine.
What are the most common embroidery digitizing mistakes?
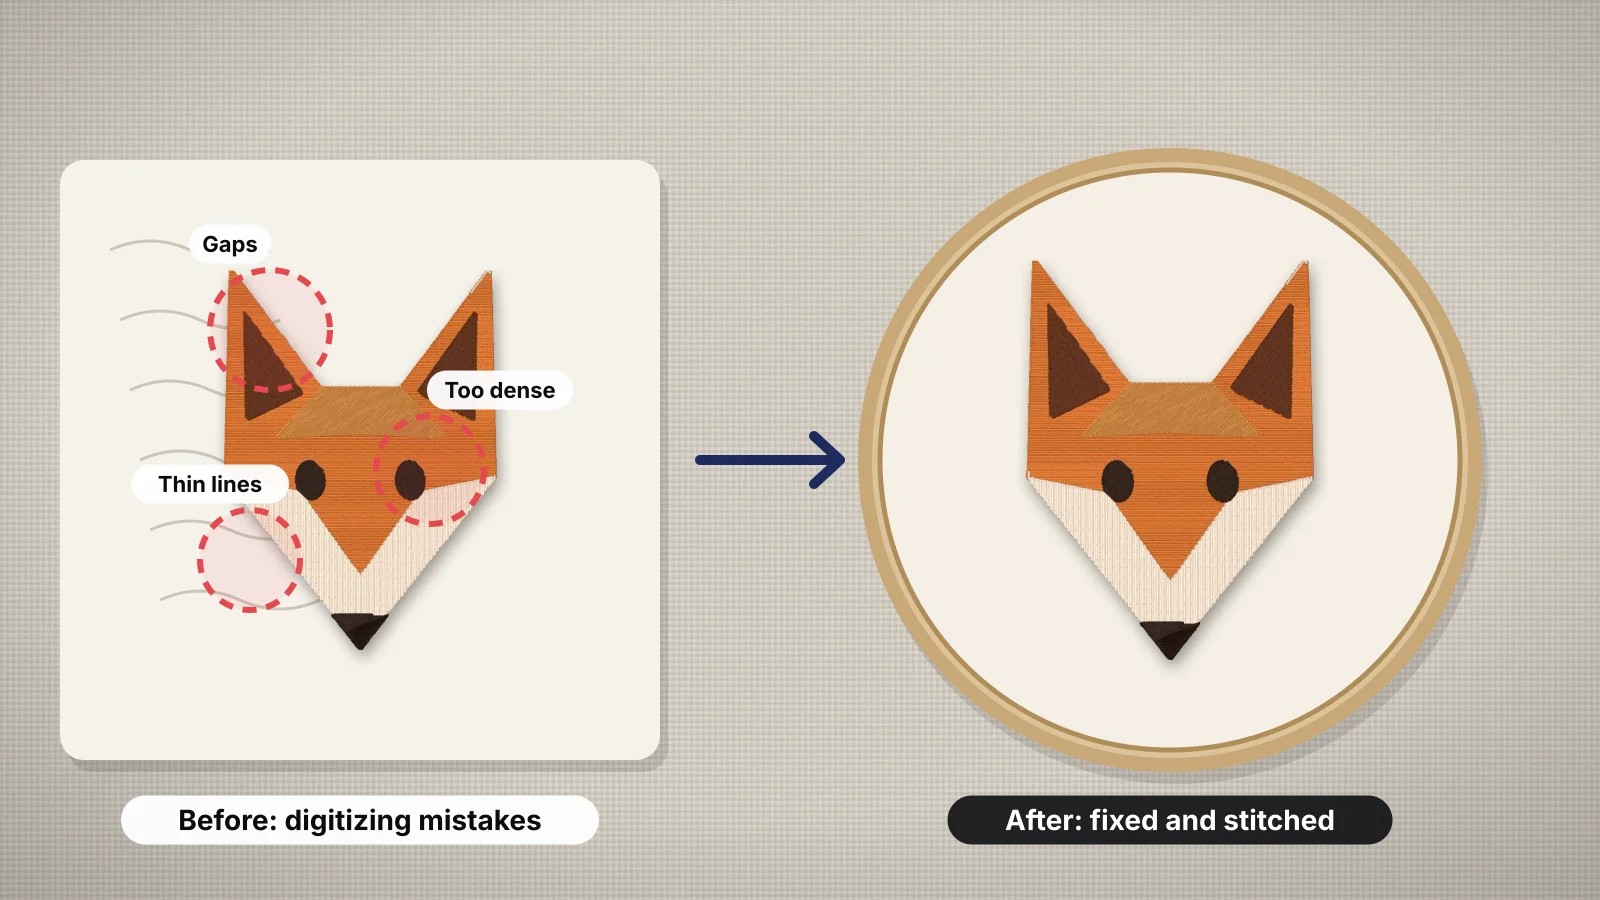
The 14 mistakes below cause most badly sewn designs. Each leaves a recognizable sign on the fabric, so you can work back from the sew-out to the cause.
| Mistake | What you see on the fabric | Fix |
|---|---|---|
| 1. Digitizing at the wrong size, or scaling the file later | Stiff fills after shrinking; open fills and loose satins after enlarging | Digitize at the final size; scale a stitch file no more than 10–20% |
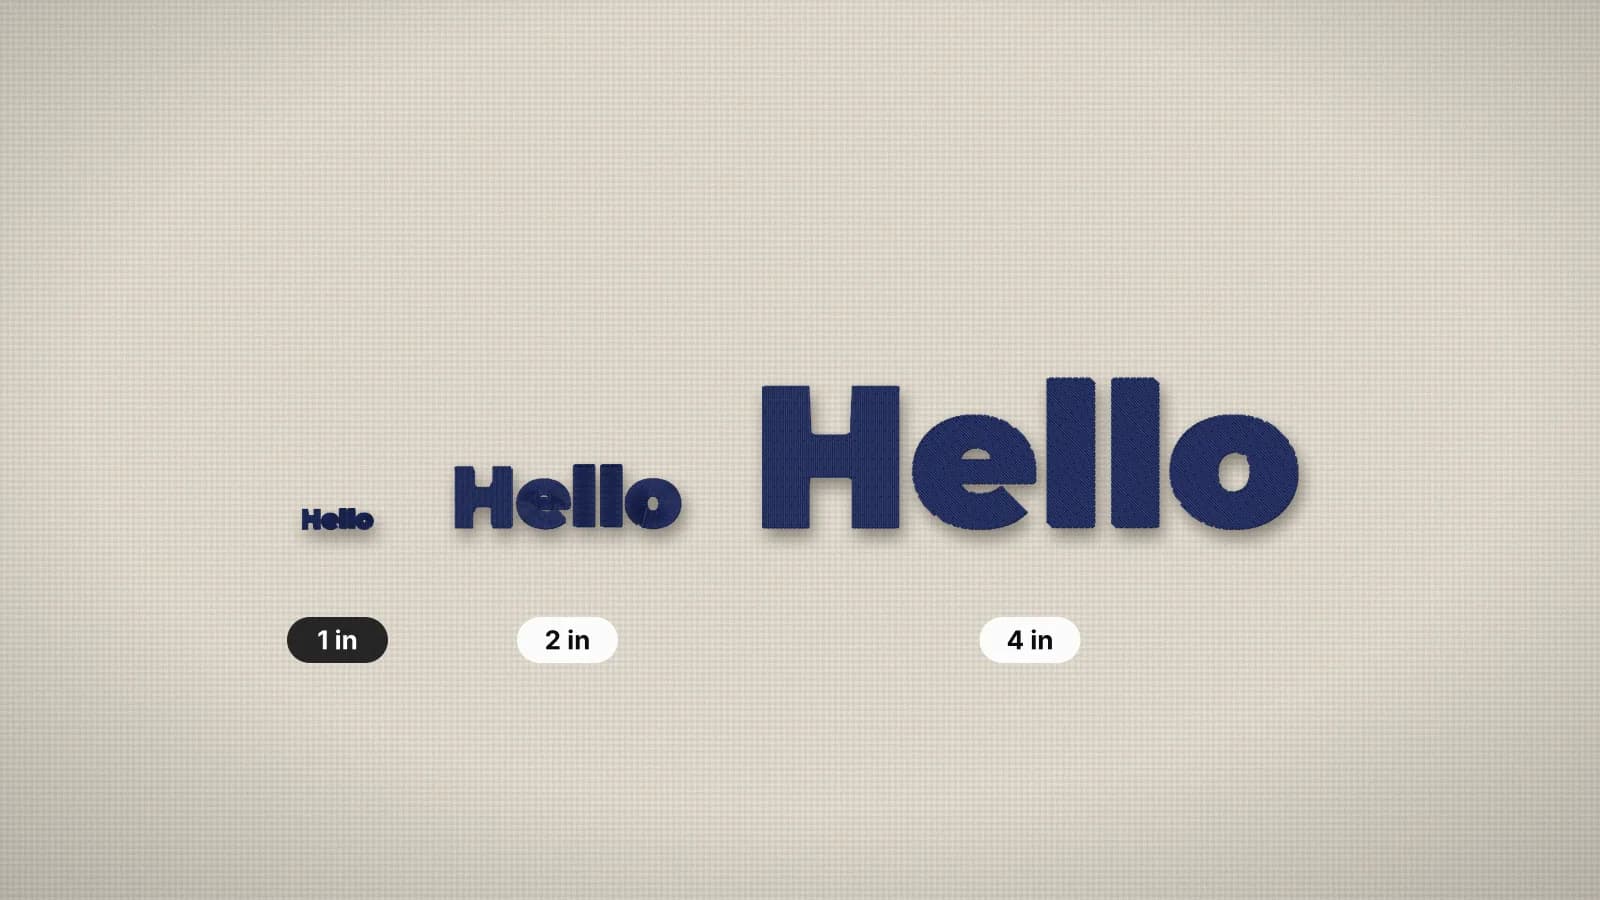
| 2. Text and details too small | Letters that fill in, broken strokes, thread breaks in one spot | Capitals at least 5 mm tall, strokes and gaps at least 1 mm |
| 3. Fills too dense | Stiff, puckered fabric, thread breaks, needle holes that cut knits | About 0.4 mm spacing for 40 wt thread; lighter on knits |
| 4. No underlay | Stitches sinking in, ragged edges, fabric showing through | Center run, edge run, zigzag or fill underlay to suit each shape |
| 5. No pull compensation | Satins narrower than drawn, outlines that miss their fills, gaps between colors | Widen shapes about 0.2–0.35 mm per side, by fabric |
| 6. Wrong stitch type for the width | Ragged narrow fills, satin under 0.8 mm that breaks up | Running stitch under 0.75 mm, satin to about 6.5–7 mm, fill above |
| 7. Satin stitches longer than about 7 mm | Loose loops that snag and wash badly | Split the satin, or sew the shape as fill |
| 8. Too many colors | Dozens of stops, slow sewing, colors out of line | Two to six colors for most logos; merge near shades |
| 9. Gradients, shadows and photo detail left in | Banded color, noisy edges, specks of stray thread | Flatten the artwork into solid colors first |
| 10. Bad sewing order | Jump threads to clip, outlines off their fills, long sew times | Sew back to front, finish each area, trim only long moves |
| 11. Missing tie-ins and tie-offs | Stitches unraveling after a trim or a wash | Lock stitches at the start and end of every run |
| 12. Ignoring the fabric | A file that's crisp on twill puckers on a T-shirt or sinks into a towel | Set density, underlay and pull compensation for the fabric |
| 13. Wrong file format | The machine doesn't list the file, or shows the wrong colors | Save in the format your machine reads, such as PES for Brother |
| 14. No test sew-out | Any of the above, on the customer's garment | Sew one sample on the same fabric and stabilizer |
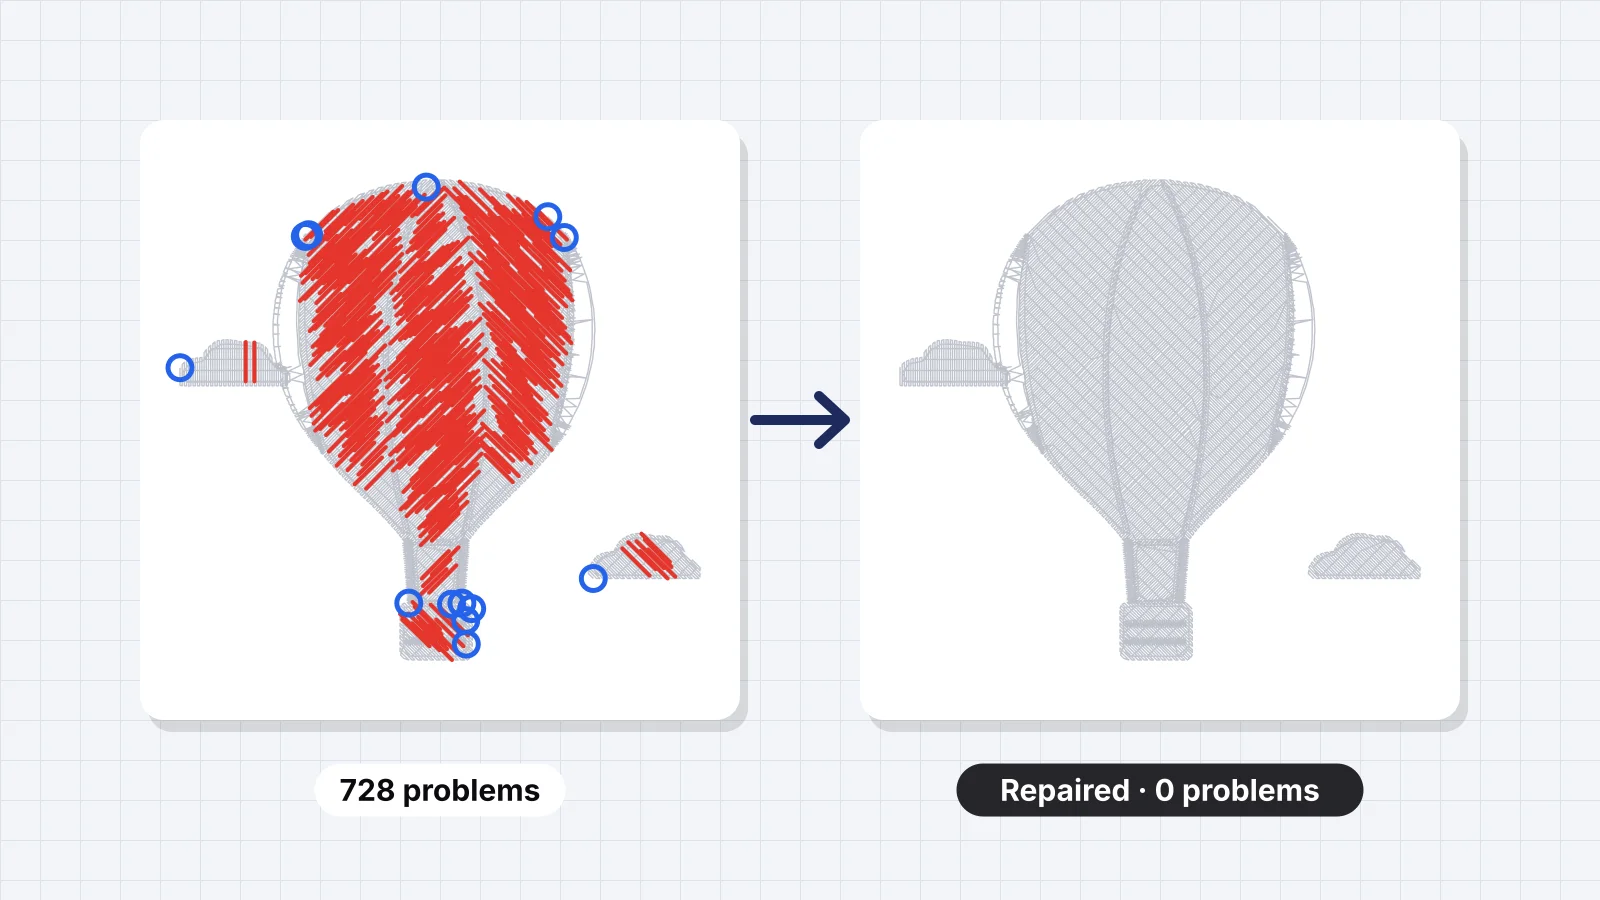
For a file you already have, the embroidery file checker scores hoop fit, long and tiny stitches, a density heatmap, trims and colors, which catches mistakes 1, 3, 7, 8 and 10 before you sew.
What happens if you digitize at the wrong size?
The stitches no longer suit the shapes. A stitch file keeps every stitch when you scale it, so a design digitized at 3 in and sewn at 4.5 in has stretched satins and open fills, and one shrunk from 4 in to 2.5 in packs the same stitches into less than half the area.
- Mistake 1: the wrong size. Decide the stitched width before you digitize: about 3–4 in (75–100 mm) for a left chest, and 4–5 in (100–125 mm) wide by 2–2.25 in tall for a cap front. Scaling a finished file by more than about 10–20% shows: at 80% of the size, a design has about 56% more stitches per square inch. The resizing guide covers the safe limits.
- Mistake 2: text and details too small. Capitals need to be at least about 5 mm (0.2 in) tall in a bold sans-serif, 6–7 mm on caps and piqué polos, and 8–10 mm for scripts. Strokes and gaps under about 1 mm close up, so the holes in a, e and o fill in. Clusters of stitches under about 0.5 mm shred thread, often in the same spot every time. The small text guide has minimums by font.
Check the artwork at its real size before digitizing. The embroidery image checker rates an image at left chest, cap front, 3 in patch or tote size and flags shapes narrower than about 0.8 mm, where satin can't form a clean column.
If a detail won't survive the size, change the design, not the stitches: enlarge the lettering, drop the tagline, or move it to a sleeve where it can be 5 mm tall.
Try it with your own design
Sign up free, upload an image and get a stitch preview in under a minute.
Drop your image here
PNG, JPG, SVG, PDF or AI · stays on your device
Not sure what to expect? See real examples or how it works.
Why do fills pucker, sink or leave gaps?
Fills pucker when they're too dense, sink when they have no underlay, and leave gaps when there's no pull compensation. These three settings are the structure of a design, and getting them wrong is the most common reason a good-looking file sews badly.
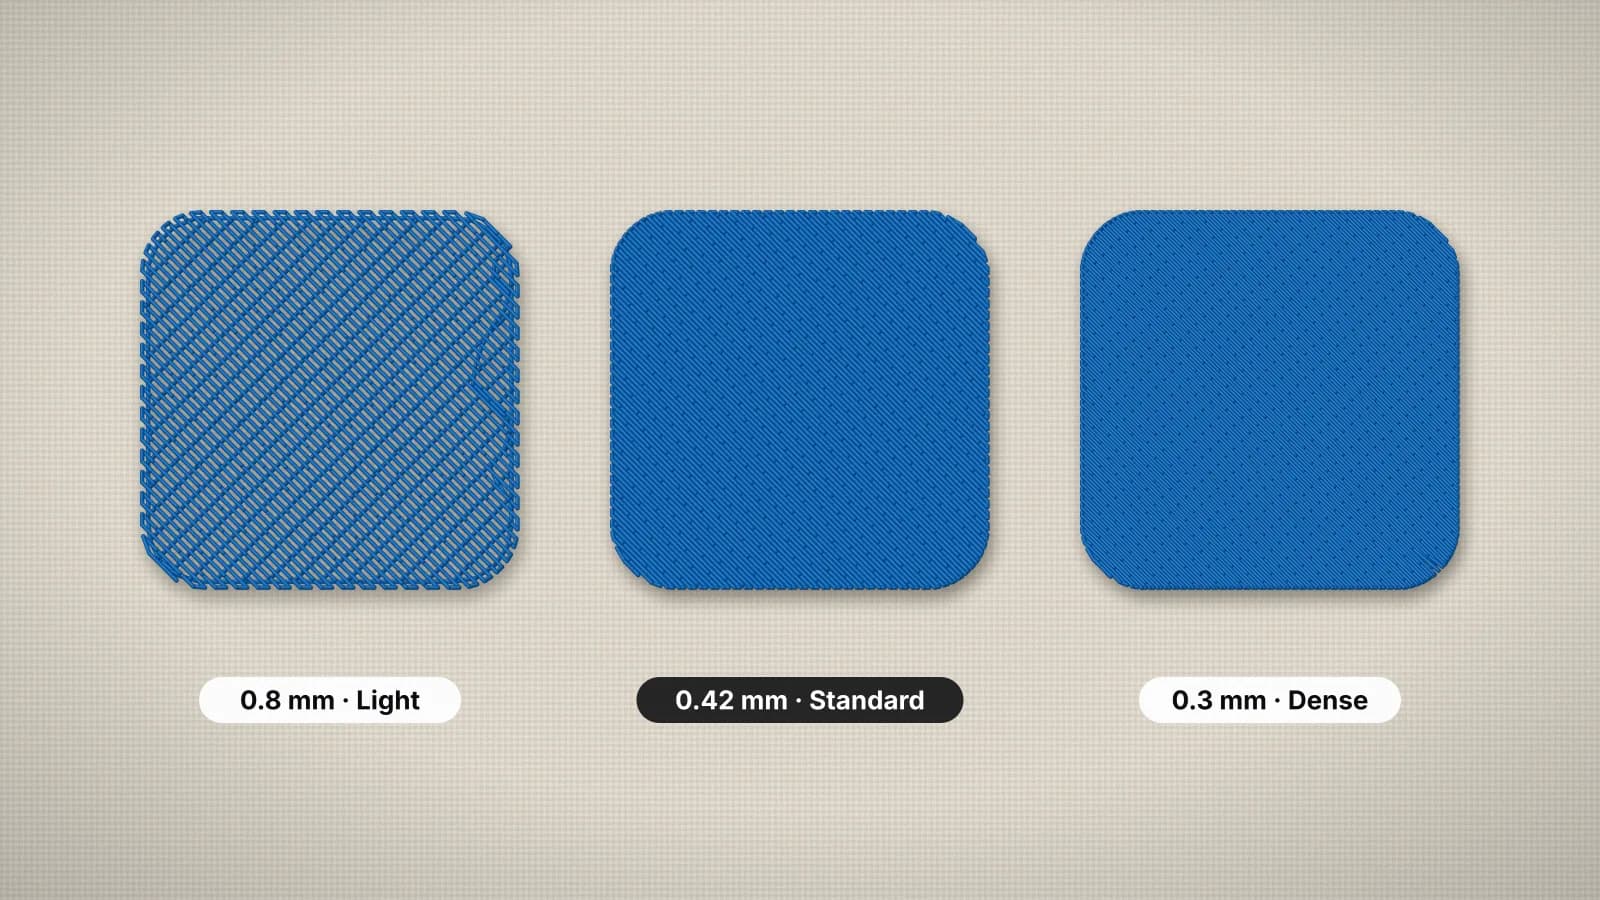
- Mistake 3: too dense. Density is the spacing between rows. About 0.4 mm suits a tatami fill in 40-weight thread on most fabrics, 0.43–0.45 mm on knits and 0.5 mm on leather. Going from 0.4 to 0.3 mm adds about a third more stitches, and stacking fill on fill doubles the thread. Use the lightest spacing that covers, and cut the top shape out of the fill below. The density guide has the full table.
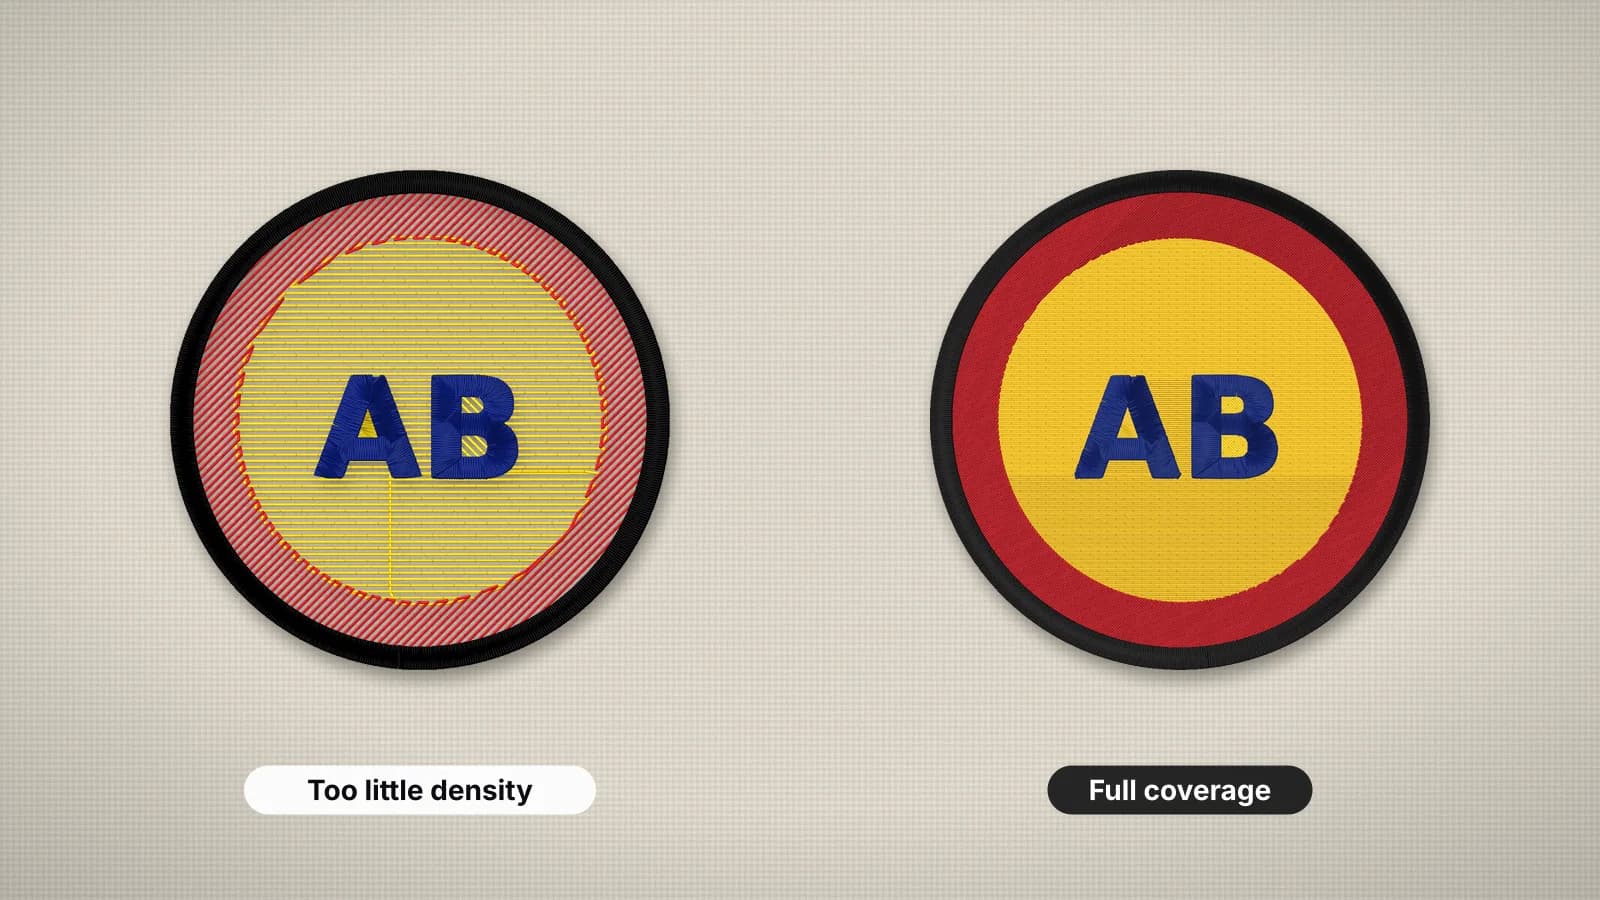
- Mistake 4: no underlay. Underlay is a light layer sewn first to hold the fabric to the stabilizer and give the top stitches a base. Without it, satins sink into knits and edges go ragged. Narrow satin takes a center run, wider satin edge runs plus a zigzag, and fills an edge run with a light fill at another angle. The underlay guide shows each type.
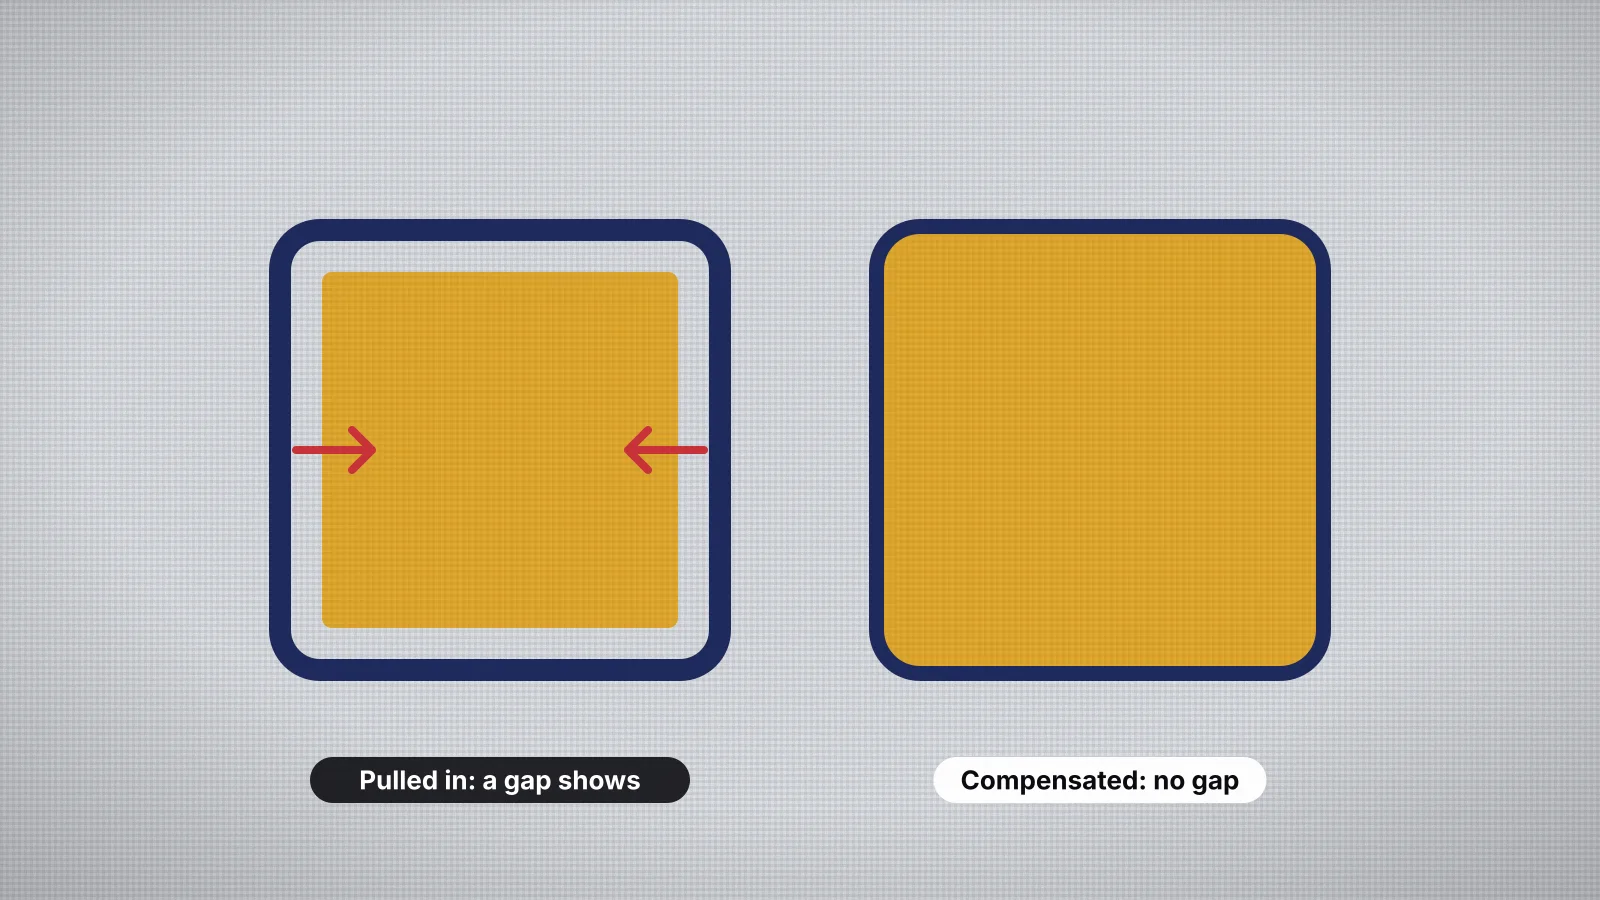
- Mistake 5: no pull compensation. Every stitch pulls the fabric in along its direction, so a 3 mm satin column can sew noticeably narrower, and an outline drawn on a fill's edge ends up inside it. Digitizers widen each shape by about 0.2 mm per side on stable wovens and 0.3–0.35 mm on knits and stretch fabric, and run lower colors slightly under the ones on top. The pull compensation guide explains how much and why.
Too much is also a mistake: heavy underlay makes small lettering lumpy, and too much pull compensation bloats satin borders. Set all three for the fabric, then adjust one at a time between test sew-outs.
Which stitch type should each shape get?
Choose the stitch by the shape's width at the stitched size: running or bean stitch under about 0.75 mm, satin from about 1 mm to 6.5–7 mm, and tatami fill for anything wider. Picking by habit instead of by width is behind most snagged, ragged or broken shapes.
| Width at the stitched size | Best stitch | What goes wrong with the wrong one |
|---|---|---|
| Under about 0.75 mm | Running or bean stitch | Satin this narrow crowds its needle holes and breaks up |
| About 1–6.5 mm | Satin | A fill in a narrow shape has jagged edges and too few rows to look solid |
| Over about 7 mm | Tatami fill, often with a satin border | Satin stitches get long, loose and snag |
Mistake 6 is the wrong stitch for the width, and mistake 7 is its most common result: satin stitches longer than about 7 mm. They lie loose on the surface, catch on zippers, jewelry and the washing machine, and pull out of shape. Formats allow up to 12.1 mm in DST, but that doesn't make them wearable. Enlarging a file is the usual way satins get too long. The satin vs fill guide covers mixing the two.
How do colors and artwork cause digitizing mistakes?
Too many colors, and artwork full of gradients, shadows or photo detail, turn into extra thread changes, banding and hundreds of tiny shapes. Thread is one solid color, so every blend becomes hard-edged areas.
- Mistake 8: too many colors. A single-needle machine stops at every color change, and a multi-needle machine with 6 to 15 needles has to be rethreaded mid-design when there are more colors than needles. Two to six colors suit most logos. Merge shades that look the same at arm's length, such as two near-identical navies.
- Mistake 9: gradients and effects left in. A gradient sews as two or three bands with visible steps, a drop shadow becomes a ragged extra color, and JPEG noise around edges becomes specks of stray thread. Flatten the art first: one solid color per area, shadows and glows deleted, a vector file or a clean PNG 1,000–2,000 px across. The reduce image colors tool cuts a picture down to a few flat thread colors with Brother or Janome matches.
Photos digitize only as a handful of flat colors, so a high-contrast photo works better than a soft portrait. Preparing artwork for embroidery walks through the cleanup.
What makes a bad sewing order?
A bad sewing order hops back and forth across the design, leaving jump threads to clip, trims that slow every piece and outlines that no longer line up with their fills. A good one sews from back to front, finishes each area before moving on and travels on stitches that later colors cover.
- Mistake 10: jumps and trims everywhere. Each trim costs a few seconds and needs lock stitches, and on machines without an automatic cutter it's a thread you clip by hand. Group each color's shapes by area, connect close neighbors with hidden travel runs, and trim only the longer moves.
- Registration. A border sewn long after its fill, once other areas have pushed the fabric around, ends up 1–2 mm off. Sew each fill and its border close together.
- Mistake 11: missing tie-ins and tie-offs. Every run of stitches needs a few tiny locking stitches at its start and end. Without them, thread pulls out after a trim and the design unravels in the wash. Most digitizing software adds them by default; hand-edited and converted files sometimes lack them.
The sew-out simulator plays a file color by color, so you can see the order, the jumps and where stitches pile up. For a file with long stitches, tiny stitches or missing tie-offs, fixing an embroidery file shows what can be repaired and what has to be digitized again.
Why do the fabric, format and test sew-out matter?
Because the same file sews differently on twill, a T-shirt and a towel, and a perfect file in the wrong format won't load at all.
- Mistake 12: ignoring the fabric. Knits need heavier underlay, more pull compensation, slightly lighter density and cut-away stabilizer. Towels and fleece need heavy underlay and a water-soluble topping. Leather needs lighter density, because every needle hole is permanent.
- Mistake 13: the wrong format. Brother and Baby Lock machines read PES, Janome JEF, Husqvarna Viking and Pfaff VP3, most current Bernina machines EXP, many Singer machines XXX, and commercial machines from Tajima, Ricoma, Happy and others DST. DST stores no thread colors, so the machine shows its own. Check your manual's format list and your hoop's sewing field; the file formats guide explains each.
- Mistake 14: no test sew-out. A screen shows stitches, not fabric. Sew one sample on the same fabric with the same stabilizer, needle and thread, and check the lettering, the gaps between colors, puckers around fills and the back.
Change one thing between test sew-outs. If you change the density, the underlay and the stabilizer at once, you won't know which one fixed it.
Practice on a free design
167 ready-to-sew designs in every machine format, free with an account.

Which mistakes does Embrizo avoid for you?
Embrizo's digitizer handles mistakes 4–7, 10, 11 and 13 by default and mistake 12 once you pick a fabric preset, and its color grouping and design check catch much of 1, 2, 8 and 9. The design and the fabric are still your decisions.
| Mistake | What Embrizo does |
|---|---|
| Wrong size | Digitizes at the width you set instead of scaling a finished file; warns about designs under 15 mm on the shorter side or bigger than an 8 × 12 in field |
| Wrong stitch type, long satins | Measures each shape at its final size: under about 0.75 mm becomes running or bean stitch, up to about 6.5 mm satin, wider areas fill. Stitches over 7 mm are split and stitches under 0.3 mm removed |
| Underlay and pull compensation | Adds both to every satin and fill: 0.2 mm per side with standard underlay on Woven, 0.3 and 0.35 mm with heavy underlay on Knit and Stretch |
| Density | Starts at 0.4 mm and adjusts per fabric; larger shapes are cut out of the fill beneath them, with 0.3 mm of overlap |
| Sewing order and tie-offs | Sews large areas first and details on top, moves to the nearest shape next, sews through gaps under 0.8 mm and ties in and off every run |
| Ignoring the fabric | Woven, Knit, Stretch, Fleece and towel, and Leather presets set density, underlay and pull compensation |
| Too fine, too many colors | Groups similar shades so JPEG noise doesn't become extra threads; the design check flags shapes under 0.8 mm, more than 12 colors, over 60,000 stitches and many trims |
| Wrong format | Writes DST, PES, JEF, EXP, VP3, XXX, PEC, U01 and TBF |
What it can't decide for you: the size the design is sewn at, whether to drop a tagline, which colors a brand will accept, the stabilizer you hoop, and whether the sample is good enough. It doesn't sequence files specifically for caps or make 3D puff and appliqué files. How it works shows every step on a real design.
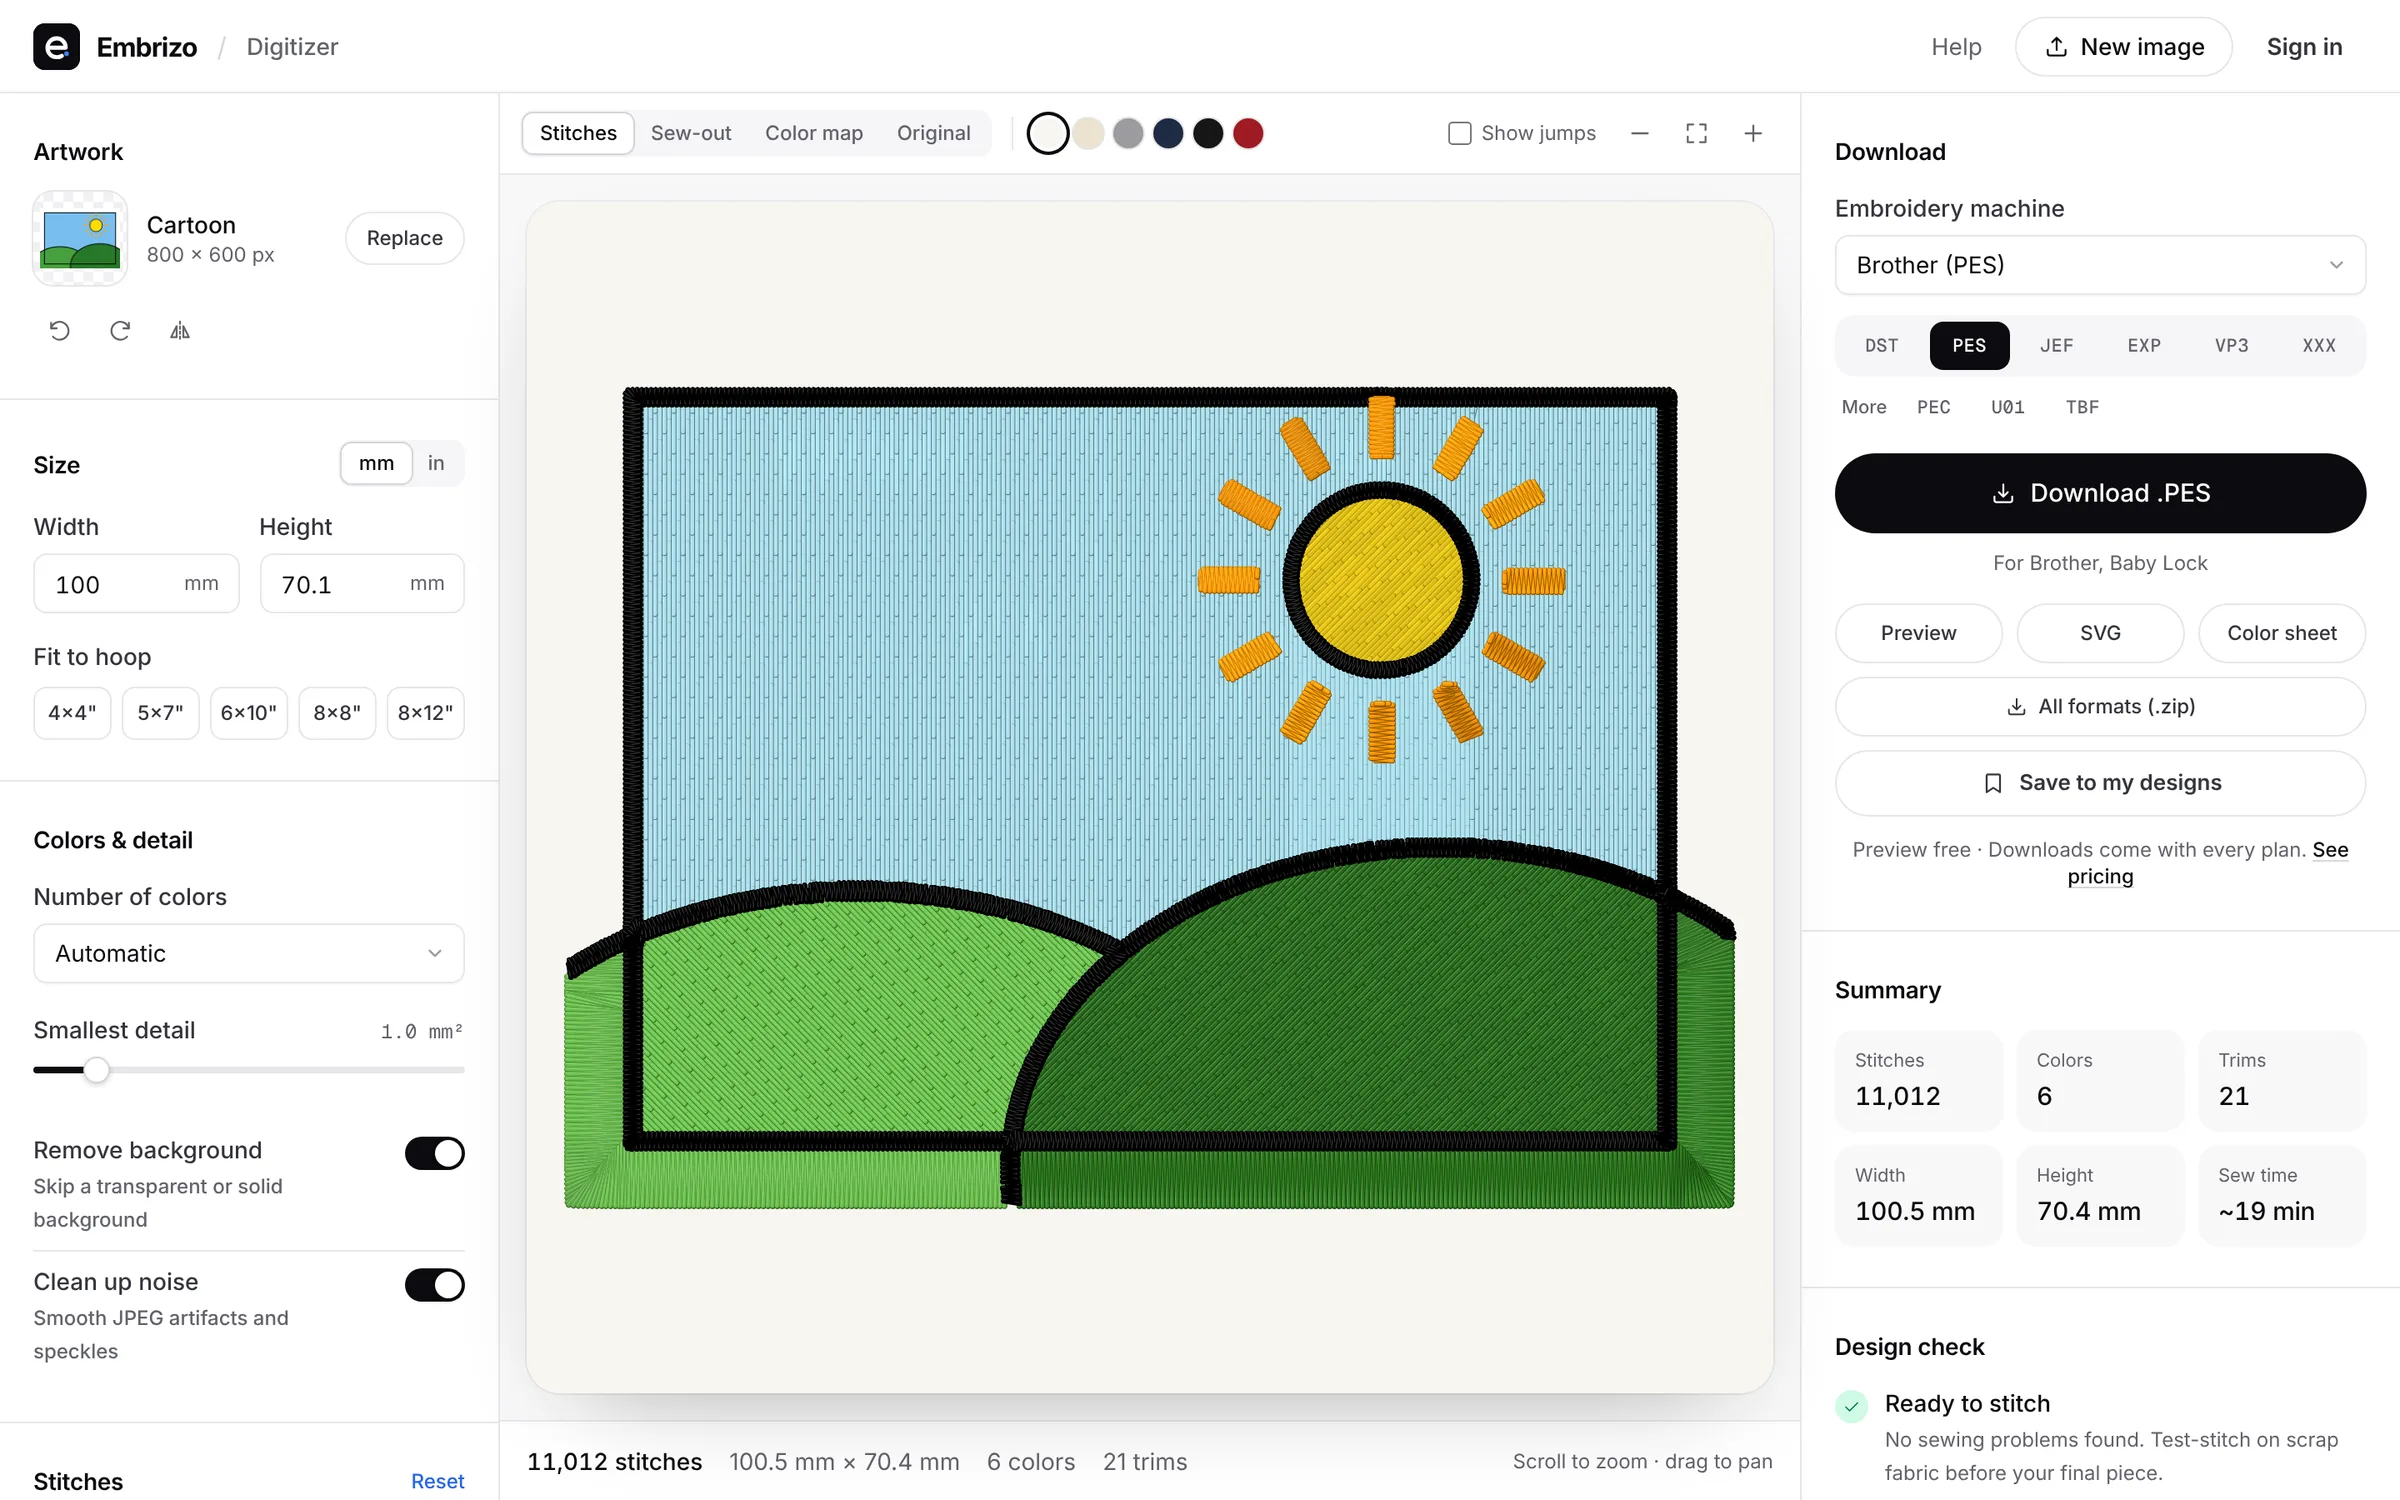
To try it, upload a PNG, JPG, SVG, PDF or Illustrator file to the digitizer, set the width, choose the fabric preset, read the design check and play the sew-out animation. You can switch any color to fill, satin or outline, merge colors, and change density, underlay and pull compensation. Digitizing and previews are free with an account; downloading files needs a plan.