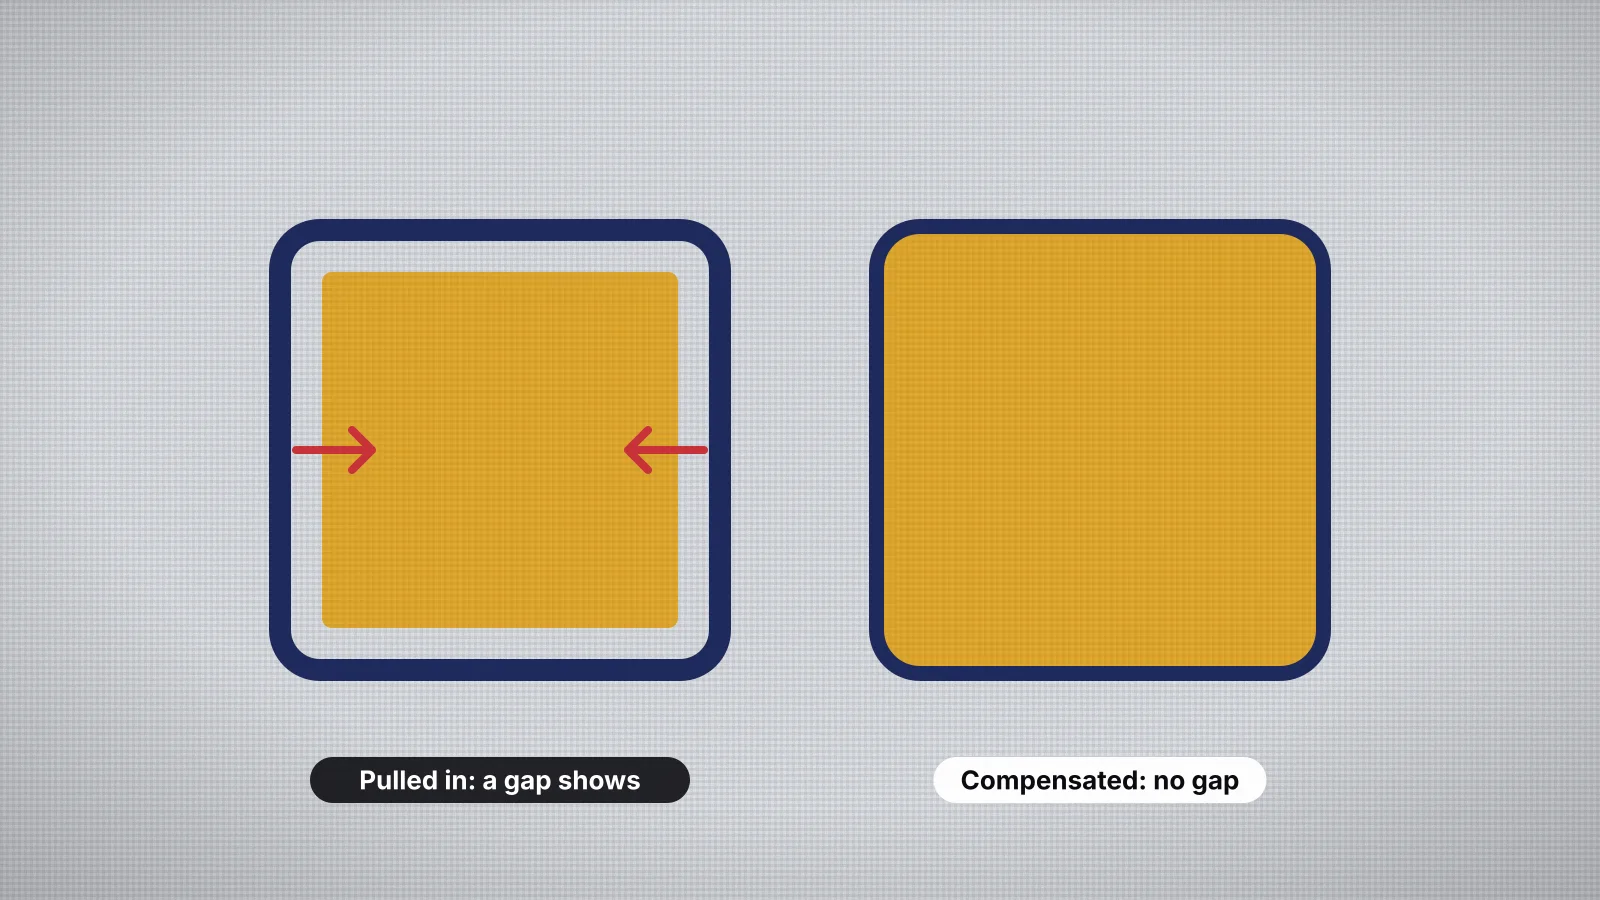
You digitize a satin border exactly the width of the shape, sew it, and find a thin line of fabric between the border and the fill. Or lettering that looked bold on screen comes out spindly. The stitches landed where the file said; the fabric just moved.
Pull compensation is how digitizing allows for that movement. This guide explains why stitches pull, what pull does to a design, how much compensation each fabric needs and how to fix pull problems.
Why stitches pull the fabric
Every stitch is a length of thread pulled tight between two needle holes. That tension draws the fabric together along the stitch's direction, a tiny amount each time. Across thousands of stitches, a shape shrinks along its stitch direction and, as the fabric bunches up, grows slightly the other way.
- Pull acts along the stitch direction: a satin column stitched from side to side gets narrower.
- Push acts at right angles to it: a circle filled with horizontal rows tends to sew narrower and taller. The push compensation entry covers it.
- More stitches pull harder. Dense fills and wide satin pull more than light fills and running stitch.
- Soft fabric gives way. Knits, stretch fabrics and fleece pull in more than firm twill and canvas.
What pull does to a design
| Problem | What you see | Why |
|---|---|---|
| Gaps between fill and outline | A line of fabric between a fill and its border | The fill shrank away from the edge the outline was placed on |
| Thin satin columns | Borders and lettering narrower than drawn | Each column pulled in from both sides |
| Spindly lettering | Strokes that look weak next to the artwork | Narrow strokes lose a bigger share of their width |
| Colors out of line | Neighboring colors that don't quite meet | Each shape pulled in its own stitch direction |
| Circles that sew as ovals | Round shapes squashed one way | Pull in one direction, push in the other |
Narrow shapes suffer most: losing 0.2 mm from each side barely shows on a 6 mm column but is a large share of a 1.5 mm one, which is why small lettering and thin borders go first. How to fix gaps in embroidery covers gaps from every cause.
Try it with your own design
Sign up free, upload an image and get a stitch preview in under a minute.
Drop your image here
PNG, JPG, SVG, PDF or AI · stays on your device
Not sure what to expect? See real examples or how it works.
How pull compensation works
Pull compensation widens each shape slightly along its stitch direction before it's stitched, so it pulls back to the drawn size. It's usually set as a distance added to each side, in millimeters:
- On satin, each stitch reaches a little further at both ends, so the column is wider than drawn by twice the setting.
- On fills, each row is extended at both ends, so the fill reaches past its edge by the setting.
- Some programs also offer compensation as a percentage of the width, so wide columns get more than narrow ones, or combine a fixed amount with a percentage.
It works alongside underlay, which steadies the fabric before the top stitches pull, and overlap, where lower colors run slightly under the ones on top so a small shift doesn't show.
Typical pull compensation by fabric
There's no single right number: it depends on the fabric, the stabilizer, the density and the thread. These are common starting points, and match the fabric presets in Embrizo's digitizer:
| Fabric | Per side | Notes |
|---|---|---|
| Stable wovens: twill, canvas, denim | About 0.2 mm | The usual starting point |
| Knits: T-shirts, polos | About 0.3 mm | With heavy underlay and a cut-away stabilizer |
| Stretch and performance fabric | About 0.35 mm | The most movement under the needle |
| Fleece, towels, sweatshirts | About 0.3 mm | With heavy underlay and a topping |
| Leather and vinyl | About 0.1 mm | Firm, and every needle hole is permanent |
Treat these as a start and test on the real fabric. If outlines still miss their fills, raise it a step, such as from 0.2 to 0.3 mm. If shapes look bloated, satin edges look rough or small letters start to close up, it's too much.
How Embrizo applies pull compensation
The Embrizo digitizer adds pull compensation to every satin column and fill, set by the fabric preset you choose, and you can set it yourself from 0 to 0.5 mm in the Stitches panel.
- Satin columns grow by up to the setting on each side, a little less on very narrow columns so small lettering doesn't turn bold.
- Fill rows are extended by the setting at both ends.
- Overlap: lower colors extend 0.3 mm under the ones on top.
- Underlay at the preset's level steadies the fabric first.
Change the preset or the setting and the stitches are recalculated, so you can compare in the preview. Digitizing and previewing are free with an account; downloading the file needs a plan.
Practice on a free design
167 ready-to-sew designs in every machine format, free with an account.




How to fix pull problems
- Pick the right fabric preset before anything else. A design digitized for woven twill can gap on a T-shirt.
- Raise pull compensation a step if outlines miss their fills or satin looks thin, then test again.
- Hoop firmly without stretching. A knit pulled tight in the hoop relaxes afterwards and opens gaps; see how to hoop fabric for embroidery.
- Use cut-away on knits and stretch fabric, so the fabric can't move partway through the design.
- Check the top tension. Tension that's too tight pulls every stitch harder.
- Widen thin outlines. A satin border of about 2–3 mm hides small shifts better than a 1 mm line.
- Digitize again at the final size rather than resizing a stitch file, which keeps the compensation it was made with.
With a bought file and no artwork there's less you can change, so hooping, stabilizer and tension are the main fixes. The embroidery troubleshooter narrows down the cause in a couple of questions.


